type
Post
status
Published
date
Nov 20, 2025
slug
RaspberryPi
summary
Mastering Inputs and Outputs: Two Raspberry Pi Projects with Explorer HAT Pro
tags
Study
Notes
Device
推荐
category
Technology Sharing
icon
password
Mastering Inputs and Outputs: Two Raspberry Pi Projects with Explorer HAT Pro
Acknowledgements
Special thanks to Professor Marwan D. Saleh from the University of Southampton Malaysia for his technical support and for providing the equipment used in this project. This article references the following Pimoroni tutorials:
In the world of IoT (Internet of Things), every system boils down to two fundamental concepts: Inputs (sensing the world) and Outputs (acting on the world).
In this post, we will build two distinct projects using a Raspberry Pi, the Explorer HAT Pro, and the Flask web framework to master these concepts:
- Smart Temperature Monitor: Reading analog sensor data (Input).
- Interactive Quiz System: Controlling physical hardware via a webpage (Output).
🛠️ The Gear
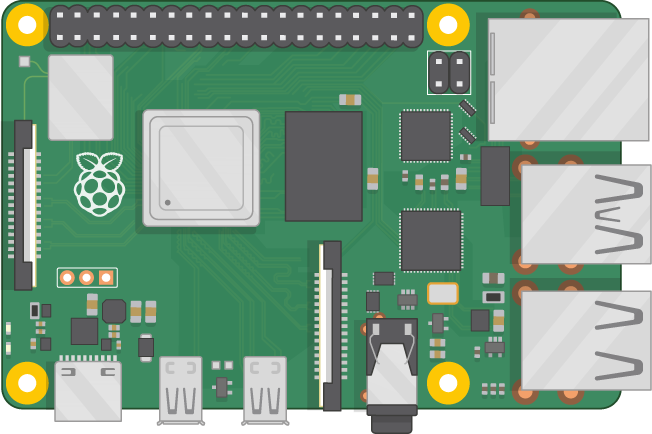
Both projects utilize the Explorer HAT Pro, which mounts directly onto the Raspberry Pi's GPIO header111. This HAT provides a safe and easy way to connect sensors and LEDs using a mini-breadboard.
Required Components:
- Raspberry Pi 4 (or 3B+) with power supply2.
- Explorer HAT Pro3.
Project 1: TMP36 Analog Temperature Sensor4.
Project 2: 1x Blue LED, 1x Red LED, 2x 470Ω Resistors5555.
Both: 1x Buzzer and Jumper wires6.
If your Explorer HAT Pro isn't set up yet, you'll need to do the following:
Those commands will install set up I2C and install the Explorer HAT Python library.
Next, you'll want to plug your Explorer HAT Pro into the 40 pin GPIO connector on your Raspberry Pi. You can check it's working by typing the following straight in the terminal:
That should light up all four of the LEDs on the Explorer HAT Pro board for a second and then switch them all off again. If that works, then your Explorer HAT Pro is good to go!
Project 1: Sensing the World (Analog Input)
🌡️ The Smart Temperature Monitor
Our first goal is to build a dashboard that continuously monitors room temperature. If it gets too hot (over 30°C), a buzzer will sound an alarm7.
Hardware Setup
The TMP36 sensor is sensitive, so wiring orientation is critical. Holding the sensor with the flat face toward you, the pins are 1, 2, and 3 from left to right8888.
Wiring Map (Refer to the image below):
Vout (Pin 1/Left): Connect to Analog Input A1 (This sends the data)999.
GND (Pin 2/Middle): Connect to GND101010.
+Vs (Pin 3/Right): Connect to 5V111111.
Buzzer: Connect Positive (+) to OUT1 and Negative (-) to GND12.
Visual Reference:


The Code (Python + Flask)
We use the explorerhat library to read the voltage. The TMP36 formula converts voltage to Celsius:
$$Temperature (^\circ C) = (Voltage - 0.5) \times 100$$
13.
Here is the complete
app.py for the monitor:Project 2: Physical Feedback (Digital Output)
🏆 The Interactive Quiz System
Now we switch roles. Instead of reading data, we will use a web page to control the physical world. We will build a quiz where a correct answer lights a Blue LED, and a wrong answer lights a Red LED and buzzes14.
Hardware Setup
We will use the Output pins (OUT) on the Explorer HAT Pro.
- Blue LED (Correct): Connect Anode (+) to OUT2 via a 470Ω resistor. Connect Cathode (-) to GND15151515.
- Red LED (Incorrect): Connect Anode (+) to OUT3 via a 470Ω resistor. Connect Cathode (-) to GND16161616.
Buzzer: Keep connected to OUT117.
Visual Reference:

The Code (Python + Flask)
This app uses a POST request to check the user's answer. Based on the result, it triggers the specific hardware pins.
Here is the complete
app.py for the quiz:Summary
By combining these two projects, you have successfully built a system that can listen to the environment (via the TMP36) and speak back to it (via LEDs and Buzzers). This cycle of Input → Processing → Output is the heartbeat of all modern robotics and IoT systems.
Next Step for You:
Try combining them! Can you modify the code so the Quiz allows you to answer questions only if the room temperature is below 28°C?
Happy Coding! 🚀
Github Repositories:
Interactive-Quiz-System
LQ67-67 • Updated Nov 20, 2025
Sensing-the-World
LQ67-67 • Updated Nov 20, 2025
- Author:Skim
- URL:https://liuqi.cc/Technology%20Sharing/RaspberryPi
- Copyright:All articles in this blog, except for special statements, adopt BY-NC-SA agreement. Please indicate the source!